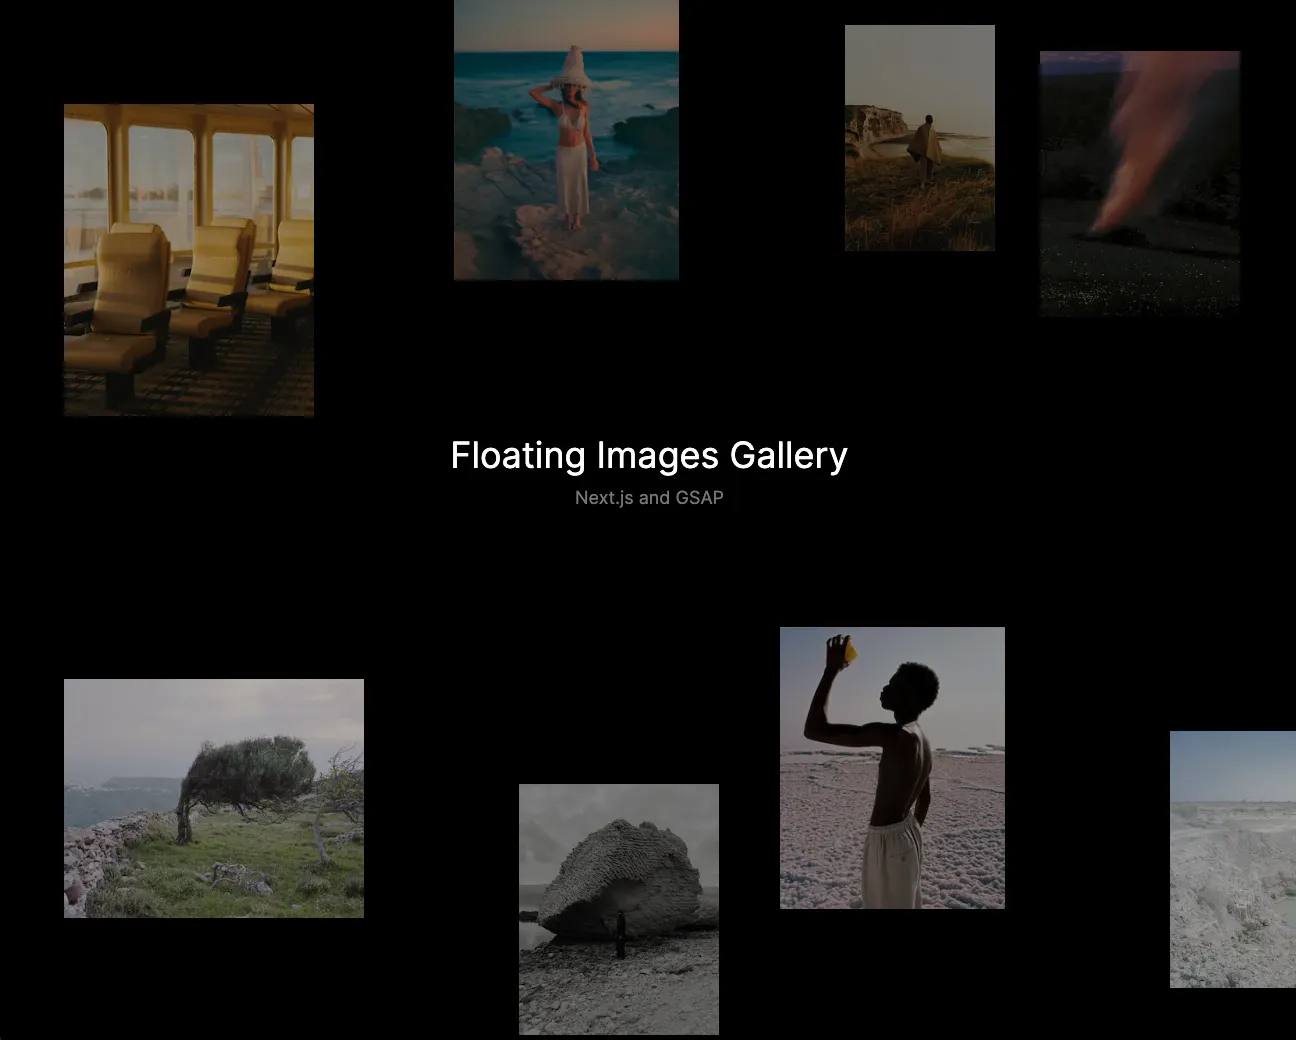
Floating Image Gallery
How to make a Floating Image Gallery using Nextjs and GSAP
NarakCODE • October 20, 2024

Initializing the project
Let's start the project by creating a Next.js application. We can do that by running npx create-next-app@latest client inside of a terminal.
Adding the HTML and CSS
We can delete everything in the page.js , global.css and page.module.css and add our own HTML and CSS, to start with a nice blank application.
- We will use Sass for the stylesheets, so we can run
npm i sass.
Formating the data
We're going to render the images using the next/image. Since we want to use the natural aspect ratio of the images (we're going to specify the width and let the height be auto), we need to staticaly import them.
1// src/data.js
2import floating1 from '../public/images/floating_1.jpg';
3import floating2 from '../public/images/floating_2.jpg';
4import floating3 from '../public/images/floating_3.jpg';
5import floating4 from '../public/images/floating_4.jpg';
6import floating5 from '../public/images/floating_5.jpg';
7import floating6 from '../public/images/floating_6.jpg';
8import floating7 from '../public/images/floating_7.jpg';
9import floating8 from '../public/images/floating_8.jpg';
10
11export {
12  floating1,
13  floating2,
14  floating3,
15  floating4,
16  floating5,
17  floating6,
18  floating7,
19  floating8,
20};
Page component
We can then import the data in a cleaner fashion and create the title of the page.
1// page.jsx
2import styles from './page.module.scss';
3import {
4  floating1,
5  floating2,
6  floating3,
7  floating4,
8  floating5,
9  floating6,
10  floating7,
11  floating8,
12} from '../data';
13
14export default function Home() {
15  return (
16    <main className={styles.main}>
17      <div className={styles.title}>
18        <h1>Floating Images Gallery</h1>
19        <p>Next.js and GSAP</p>
20      </div>
21    </main>
22  );
23}
Styles
1// page.module.scss
2.main {
3  height: 100vh;
4  width: 100vw;
5  overflow: hidden;
6  position: relative;
7  .title {
8    position: absolute;
9    left: 50%;
10    top: 45%;
11    transform: translateX(-50%) translateY(-50%);
12    font-size: 18px;
13    h1 {
14      font-weight: 400;
15      color: white;
16      margin: 0px;
17      text-align: center;
18    }
19    p {
20      color: grey;
21      margin: 0px;
22      text-align: center;
23      margin-top: 10px;
24    }
25  }
26}1/* globals.css */
2body {
3 background-color: black;
4 margin: 0px;
5}We should have something like this:

Adding the Images
To animate the images, we're actually not going to directly change their position. Instead we will change the position of their parent (div). That way, we have a more performance optimized animaiton.
We will have 3 main divs called plane:
1// page.jsx
2'use client';
3import Image from 'next/image';
4import { useRef } from 'react';
5
6export default function Home() {
7  const plane1 = useRef(null);
8  const plane2 = useRef(null);
9  const plane3 = useRef(null);
10
11  return (
12    <main className={styles.main}>
13      <div ref={plane1} className={styles.plane}>
14        <Image src={floating1} alt='image' width={300} />
15        <Image src={floating2} alt='image' width={300} />
16        <Image src={floating7} alt='image' width={225} />
17      </div>
18      <div ref={plane2} className={styles.plane}>
19        <Image src={floating4} alt='image' width={250} />
20        <Image src={floating6} alt='image' width={200} />
21        <Image src={floating8} alt='image' width={225} />
22      </div>
23      <div ref={plane3} className={styles.plane}>
24        <Image src={floating3} alt='image' width={150} />
25        <Image src={floating5} alt='image' width={200} />
26      </div>
27      ...
28    </main>
29  );
30}
We should have something like this:
Animating the Images
Like I said earlier, I'm not directly changing the position of the images but rather their parent:
We're also going to use the Linear Interpolation to create the easing:
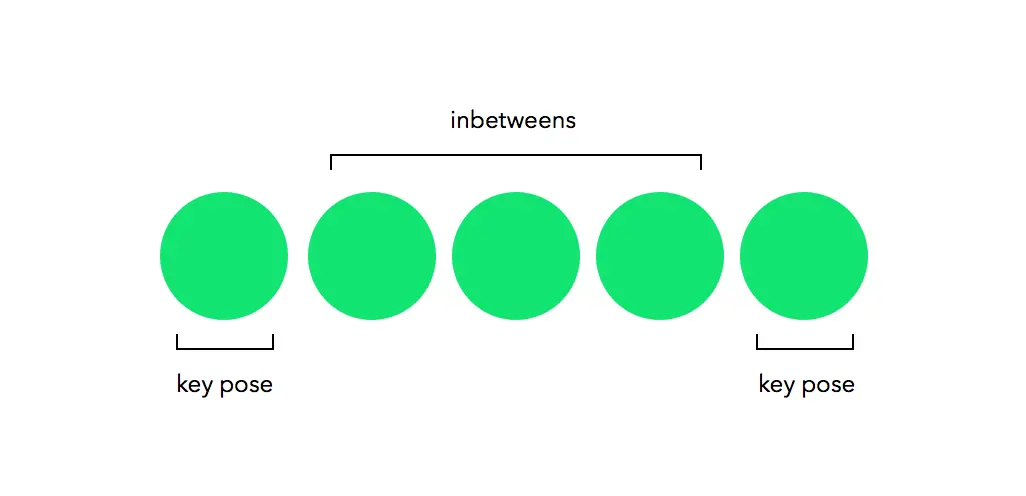
The Linear Interpolation
Linear interpolation is a key concept in animations. It is often used by motion designers, but we can also use it for web animations! In short, it is form of interpolation, which involves the generation of new values based on an existing set of values
Lerp in JavaScript
1let value = 10;
2
3const lerp = (x, y, a) => x * (1 - a) + y * a;
4value = lerp(value, 0, 0.1);
5
6console.log(value);
7//9x: The value we want to interpolate from (start)y: The target value we want to interpolate to (end)a: The amount by which we wantxto be closer toy.
Translating everything in code:
Great. Now we can jump in the code and understand exactly what's going on.
1// page.jsx
2...
3export default function Home() {
4
5  const plane1 = useRef(null);
6  const plane2 = useRef(null);
7  const plane3 = useRef(null);
8  let requestAnimationFrameId = null;
9  let xForce = 0;
10  let yForce = 0;
11 const easing = 0.08;
12 const speed = 0.01;
13
14  const manageMouseMove = (e) => {
15    const { movementX, movementY } = e
16    xForce += movementX * speed;
17    yForce += movementY * speed;
18
19    if(requestAnimationFrameId == null){
20      requestAnimationFrameId = requestAnimationFrame(animate);
21    }
22  }
23
24  const lerp = (start, target, amount) => start * (1 - amount) +target * amount;
25
26  const animate = () => {
27    xForce = lerp(xForce, 0, easing);
28    yForce = lerp(yForce, 0, easing);
29    gsap.set(plane1.current, {x: `+=${xForce}`, y: `+=${yForce}`})
30    gsap.set(plane2.current, {x: `+=${xForce * 0.5}`, y: `+=${yForce * 0.5}`})
31    gsap.set(plane3.current, {x: `+=${xForce * 0.25}`, y: `+=${yForce * 0.25}`})
32
33    if(Math.abs(xForce) < 0.01) xForce = 0;
34    if(Math.abs(yForce) < 0.01) yForce = 0;
35
36    if(xForce != 0 || yForce != 0){
37      requestAnimationFrame(animate);
38    }
39    else{
40      cancelAnimationFrame(requestAnimationFrameId)
41      requestAnimationFrameId = null;
42    }
43  }
44
45  return (
46    <main onMouseMove={(e) => {manageMouseMove(e)}} className={styles.main}>
47    ...
48    ```
Couple notes about the code above:
Line 19: When the mouse moves, if there is no active requestAnimationFrame instance, we start a new one.Line 26, 27: We use the linear interpolation to create an easing. Instead of directly linking the movement of the mouse with the movement of the images, we slow down that value using the lerp.Line 28, 29, 30: Depending on the plane, we reduce the strength of the animation.Line 32, 33, 35: If the easing is done, we cancel the instance of requestAnimationFrame.
We should have something like this:
Wrapping up
We're offically done with this animation!
That was it for this animation! Very quick but a very nice end result. Also interesting to know how to use the lerp to create an easing inside a requestAnimationFrame.